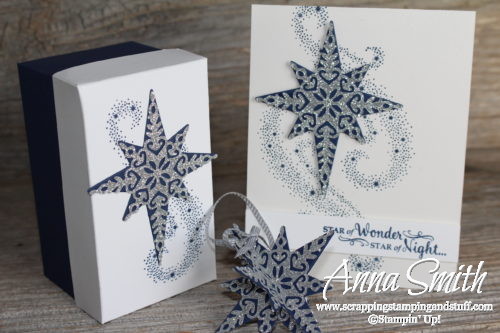
Can you believe that December is here? I must be getting old because time is flying. Every time a new month arrives, I just can’t believe that it’s here already. Maybe it has something to do with having children. My little girl will soon be turning 3. It’s amazing how fast she grows, learns, and develops. She’s two going on 16 I think. Anyway, December is here, and that means it’s time to get your decorating, gift shopping, and cards done. Today I wanted to share a neat idea for a gift set I made using our Star of Light stamp set and Starlight dies. I made a card, ornament, and matching gift box. Didn’t they turn out pretty?

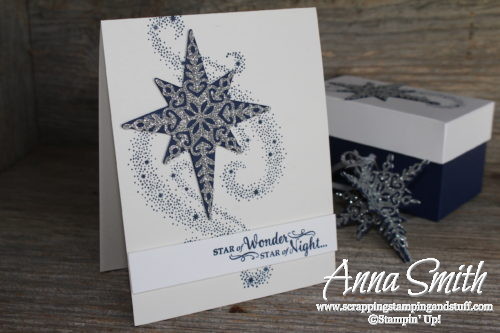
Let’s look at the card first. This was extremely simple to make. Die cutting the stars took a minute, but other than that it came together really fast.
Here’s a little tip for when you’re die cutting intricate shapes like the silver star. First, you need the Big Shot die brush (there’s a link at the bottom if you want to see what this is). After you run your paper through the Big Shot a few times, lay your paper WITH the die on top onto the the foam piece that comes with the brush. Then use the brush and roll over the paper and die vigorously. Remove the die, and most of the small pieces should be removed from the die cut. If not, it must not have cut all the way through. In this case, consider adding an extra layer of cardstock to the ‘sandwich’ you’re running through the Big Shot. That small amount of extra thickness should make the difference and allow it to cut through entirely. Also, when die cutting glitter paper, lay the paper glitter side down, and put the die on top. You always want to cut directly against the paper side, not the glitter side.

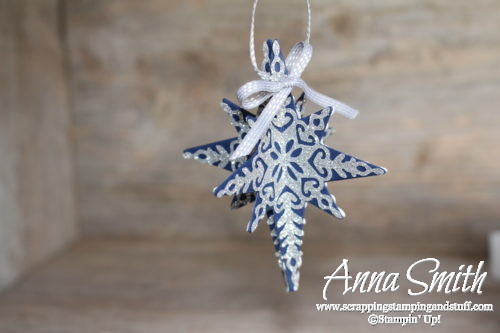
I made the ornament below using four of the star die cuts put together. I prepared them by attaching the silver star to the navy background, then folded them in half vertically to create a crease. Next, I attached them together one by one until all four were secured to create the ornament as shown. You definitely need some good adhesive for this to hold. I used multipurpose glue and laid something heavy (like a large acrylic block) on top for a minute while the glue dried. Glue dots might work as well.

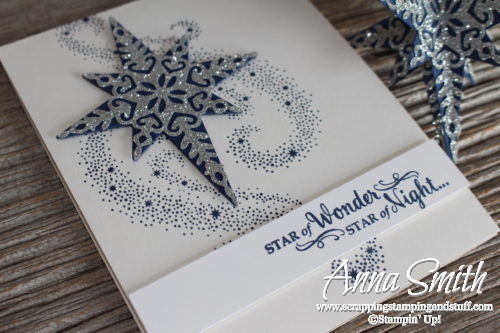
Here is another view of the card. I absolutely love that glimmering swoosh stamp in the background. I’ll have to find more good uses for that stamp since we will be carrying this set over!!! We will have it available through May, and it will likely be in next year’s Annual Catalog.

Don’t forget that retiring items have been announced and the year end closeout sale is going on! Get the items on your wish list before they’re gone! Please shop with me and combine these offers to get great deals:
- Shop year end closeouts with discounts up to 60% off here!
- Use hostess code G9MQR3AV and I will send you a free gift!
- Keep track of your Stampin’ Rewards and earn free stamps from me!
- Any purchase of $150 or more will earn you hostess credit through Stampin’ Up!
- Join online stamp club and get free products and projects.
Product List


Leave a Reply