I love adding texture and a distressed effect to cards. It’s such a fun way to step them up for professional-looking projects. I received a new bundle of products recently that inspired me to make today’s tutorial, because this bundle is all about texture. It’s called the Botanical Textures Product Suite and it includes the Stampin Up Textured Notes stamp and die set. Let’s take a look at this fun set and some awesome ways to create texture on your paper projects!
Texture Techniques Video Tutorial
Watch along here and make sure to stick around to the end for some amazing cuteness you cannot live without seeing! We’re taking a trip to the barn!
Stampin Up Textured Notes & Botanical Textures
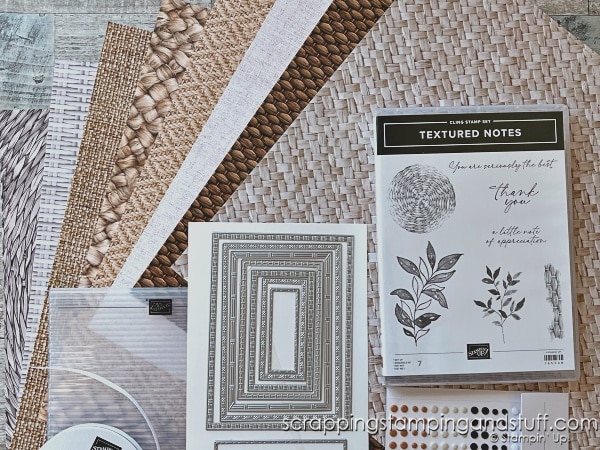
Here you can see the products that inspired today’s tutorial. It includes the Textured Notes stamp and die set, the Botanical Textures designer paper, the Mini Corrugated embossing folder, and some ribbon and gems.
Now let’s take a look at ways you can create texture on your projects!
Texture Techniques
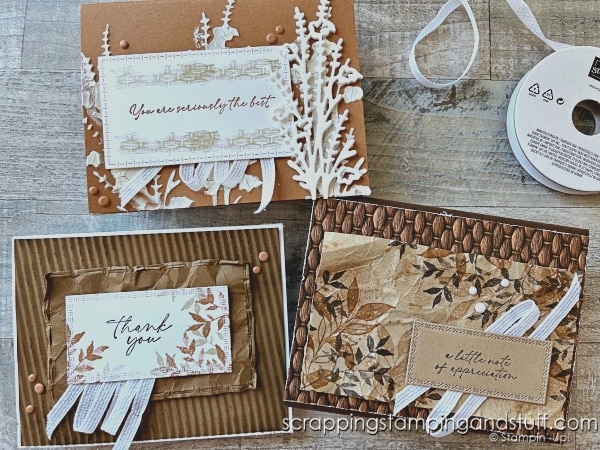
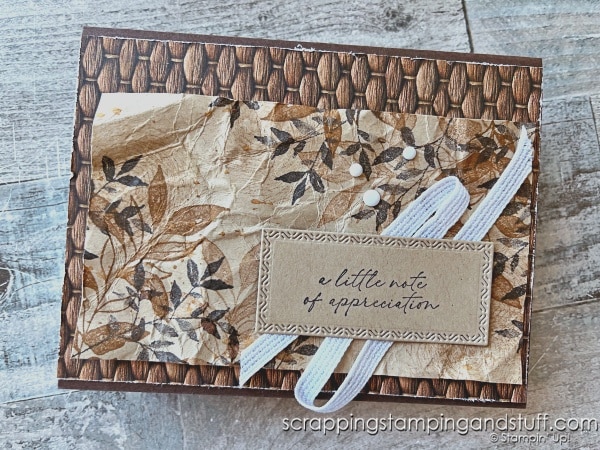
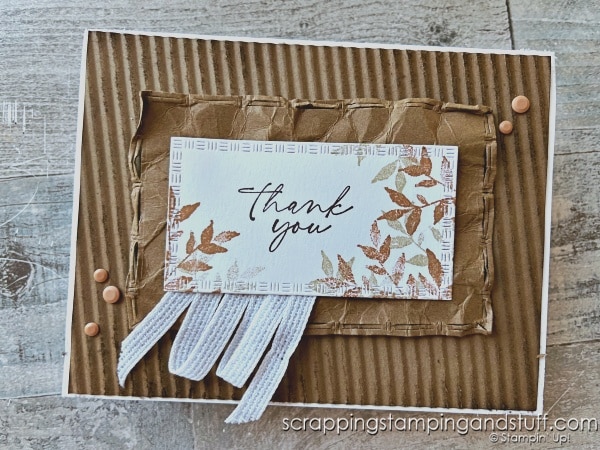
In the video tutorial, I created three different cards with several techniques on each one. The first one has added texture using designer paper, layers, crumpling, splatters, stamps, and distressed edges that I created using scissors.
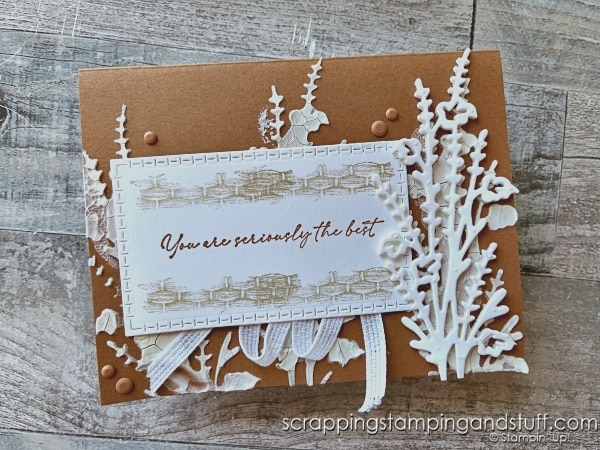
The next card includes embossing paste, textural stamps, and a die cut I created with foam adhesive sheets.
This last card uses embossing, sanding the paper, blending on top of the embossing, dimensionals, and ribbon.
What techniques are your favorites? How do you create texture and/or distressing on your projects? Which card is your favorite? Share in the comments below!
supply list
Product List")
")
")


 Designer Series Paper")


 Ribbon")


Learn To Make Cards
Shop Supplies
Rewards Program
Join My Amazing Team
Thanks for visiting to see the Stampin Up Textured Notes bundle and lots of ways to create texture on your cards!
Loved your latest video, Anna…both the cards and the baby goats. Thanks for sharing. I was raised on a farm and still live in the country (my husband and I are both retired now) so really appreciated seeing your expanding “family”. The textured cards are amazing. I’m going to order at least part of the suite you used in the next quarter and try some of your techniques. We live in Canada.
Hi Helen, thank you! I’m glad you enjoyed both the card ideas and our farm happenings!
I love the different techniques you use. Just awesome. Thanks soooo much
Debbie Quinn(DQ)
Thank you!