One of the best parts of the Christmas season is the ‘coziness’ that surrounds it. It so nice to be warm in the house, enjoying food and drink with loved ones, and cuddling up on the couch in the evenings with the tree lit. Today we have a card idea that includes the coziness of Christmas on a fun fold card. It features the Stampin Up Fireside Trimmings bundle, which has so many fun pieces and parts for Christmas!
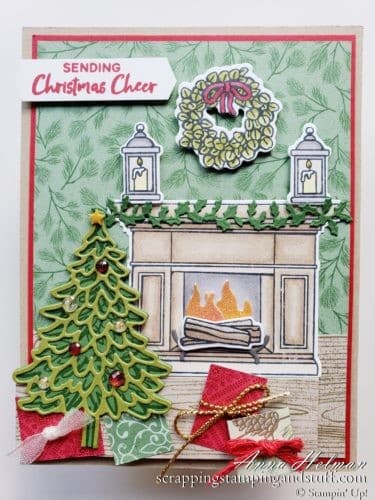
Isn’t this magnificent?! Such amazing detail!
Stamp And Die Set
Let’s take a look at the stamps and dies in the Fireside Trimmings set. The stamps include greetings for Christmas, Halloween, and two all-occasion sentiments, as well as the fireplace, wreath, mini Christmas trees, reindeer, pumpkins, candles, lanterns, a clock for the mantle, firewood, branches, leaves, pinecones, and more!
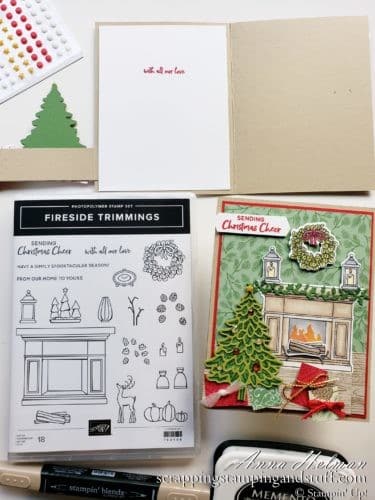
Dies are included for all of the items listed above, plus a firewood rack, flames, three small frames, and four garlands: holly, bats, stars, and pennants. It includes a lot of pieces, that you can use in so many different ways!
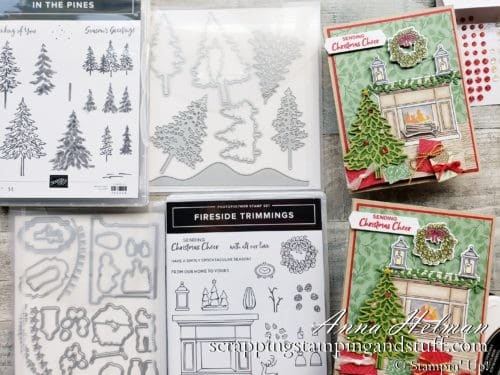
You can see both the Stampin Up Fireside Trimmings and In The Pines bundles in the photo above. I used In The Pines to make that gorgeous Christmas tree.
Card Ideas
Today’s fun fold is a perfect way to showcase the many pieces and parts in this set. You could make much simpler cards by using less items or the stamps alone.

Would you like to learn how to make this card? Let’s get started!
Video Tutorial
For video instructions for making this card, watch along with my tutorial below, or keep reading for written measurements and instructions.
Materials Needed
Begin this project by preparing the paper supplies you will need. A full list of the materials needed are at the bottom of this post including links to order. The consumable materials needed include:
- 5 1/2″ x 8 1/2″ Crumb Cake card base, folded in half
- 1″ x 4 1/4″ Crumb Cake, scored 1/2″ from a short edge
- 4″ x 5 1/4″ Real Red
- 3 7/8″ x 5 1/8″ pine print from Poinsettia Place designer series paper
- 1 1/2″ x 3 7/8″ woodgrain print from Poinsettia Place designer series paper
- 1″ x 3 3/4″ woodgrain print from Poinsettia Place designer series paper
- Whisper White, Garden Green, Old Olive, and Basic Graycardstock, Rainbow Glimmer Paper, and designer prints for die cuts and presents
- Assorted ribbons
- Wonderful Gems
- All the Trimmings Embellishments
- Stampin Up Fireside Trimmings and In The Pines Bundles
Next you can begin assembling!
Written Instructions
Assemble The Base
The card base will open to the right instead of left like usual. After the base is prepared, fold the small piece of Crumb Cake on the score line, and attach this to the inside of the card to create a flap that folds around to the front.
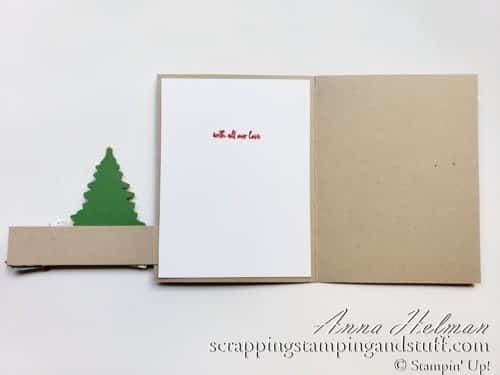
Next, attach the red cardstock, pine print, and woodgrain floor to the main panel of the card front. Then attach the small woodgrain print to the flap.
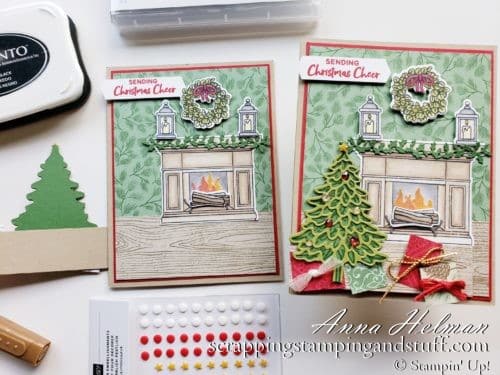
Now that the base is ready, we will prepare the die cuts.
Create Die Cuts And Presents
Use the Stampin Up Fireside Trimmings and In The Pines bundles to prepare the following items.
Tree: Die cut and stamp using Old Olive and Garden Green cardstocks and Garden Green ink.
Fireplace: Stamp with Memento Black ink. Color with Bronze and Crumb Cake Stampin Blends markers.
Lanterns: Stamp with Memento ink. Color with Smoky Slate and Daffodil Delight Blends. The background is Light Crumb Cake.
Wreath: Stamp with Memento. Color with Old Olive and Cherry Cobbler Blends.
Firewood: Stamp with Memento. Color with Bronze and Crumb Cake Blends.
Holly Garland: Die cut with Garden Green cardstock.
Presents: Cut small square and rectangular pieces of designer prints. Add bows (I share tips for this in my video tutorial).
Greeting Tag: Stamp with Real Red ink onto a strip of 1/2″ wide Whisper White cardstock. Punch each end with the Banners Pick A Punch.
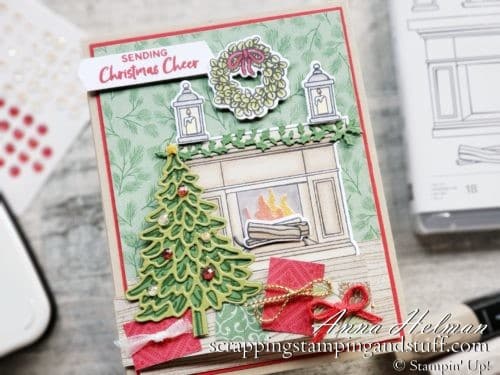
The hard work is done. It’s time to put it all together!
Attach Together And Embellish
Begin by using glue or tape to attach the following pieces directly to the card: Fireplace, holly garland, presents, wood rack, and flames.
Next, use strong adhesive across the bottom of the back of the Christmas tree to attach it only to the lower flap.
Then, attach the following pieces using foam dimensionals: firewood, lanterns, wreath, and greeting tag.
Finally, place a star from the All The Trimmings Embellishments on the tree and add Wonderful Gems for ornaments. She is complete!
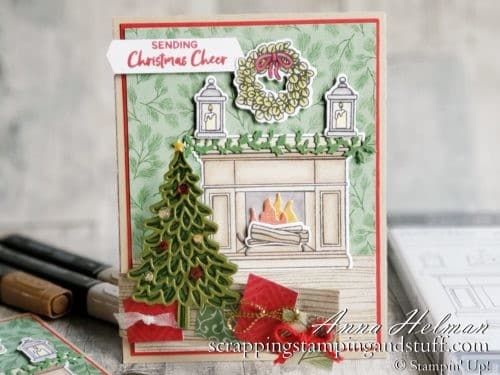
I hope you enjoyed today’s tutorial using the new Stampin Up Fireside Trimmings bundle. It’s a gorgeous set that can be used to make amazing cards!
Don’t Miss Out!
Please make me your Stampin’ Up! demonstrator! Earn rewards points towards free stamps PLUS a gift when you order using August host code: P7URKZUU. PLUS, with your first order, you’ll receive free catalogs in your thank you package!

Sign Up For My Upcoming Virtual Card Classes!
Order the products I used and make this project yourself!
You May Also Like:


[…] Stampin Up Fireside Trimmings Card […]