Hi everyone! Welcome to our first OSAT blog hop of 2017. It should be really fun to see what everyone has to share because it’s the No Rules New Year hop!
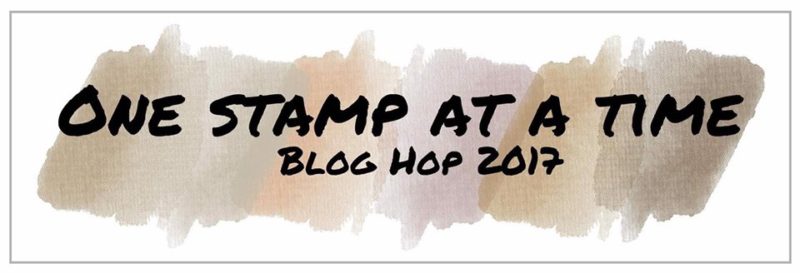
For my project this month, I came up with a cute card and desk organizer gift set, made with the new Stampin’ Up! Lift me up stamp set, Up & Away thinlits, and Carried Away designer paper that you can earn free right now with a $50 order!
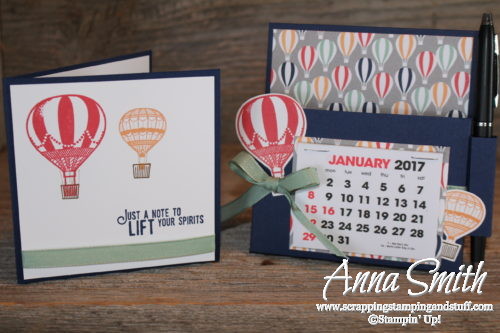
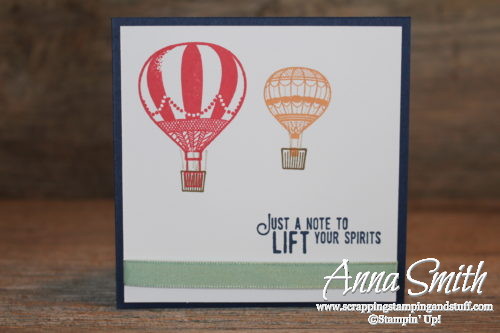
First, we’ll take a look at the clean and simple card I created. I used the Lift Me Up hot air balloon stamp set, which includes adorable ‘lofty’ greetings for birthdays, congratulations, love, thanks, and just because.
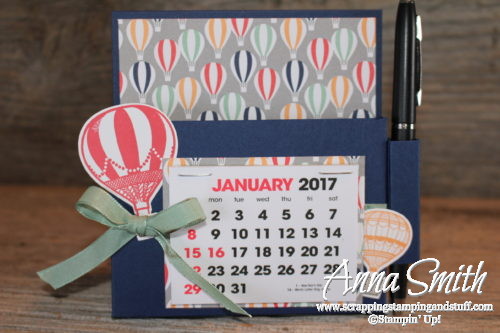
I was really happy with the way the desk organizer turned out. I included a pocket on the front for a paper pad and a pen holder on the side. Do you like it? I included a tutorial below for how to make it, so keep reading if you’re interested!
Thanks for visiting! Click the link below to see what Lori has to share with us!
Hopping along this month:
-
Anna Smith – you’re here!
Desk Organizer Tutorial
To make the desk organizer, you’ll need the following:
- 2 1/4 x 3″ calendar
- 4 1/2 x 12″ Night of Navy cardstock scored at 1/2″, 5 1/2″, 10 1/2″, and 11″
- 4 1/4 x 6 1/2″ Night of Navy cardstock scored 1/2″ and 1 ” from right, left and bottom
- 2 x 2 1/2″ Night of Navy cardstock scored at 1/2″, 1″, 1 1/2″, 2″
- 2 1/4 x 4 1/4″ designer paper
- 2 1/2 x 3 1/4″ designer paper
- 22″ Mint Macaron ribbon
- White cardstock for die cuts
- Watermelon Wonder, Peekaboo Peach, and Soft Suede ink
- Fast Fuse and Tear & Tape adhesive
Begin with the piece of 4 1/2 x 12″ Night of Navy cardstock. Score it at 1/2″, 5 1/2″, 10 1/2″, and 11.”
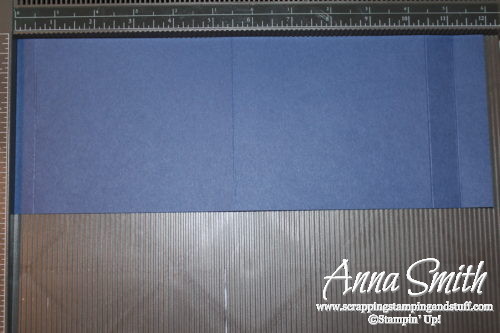
Fold on the score lines to create the tent shown below. Use a strip of Fast Fuse adhesive along one of the bottom edges, and attach the two ends together.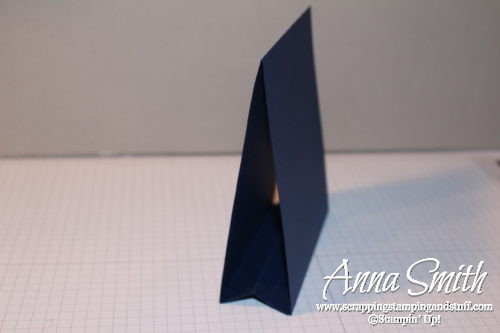
Using the piece of 4 1/4 x 6 1/2″ Night of Navy cardstock, score 1/2″ and 1 ” from the right, left and bottom.
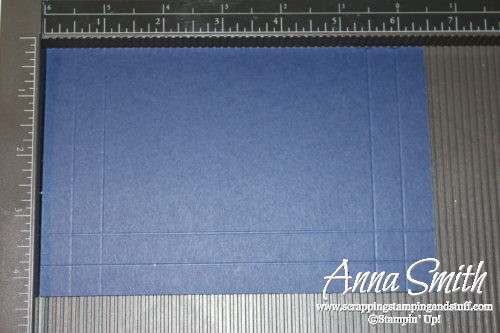
Cut out the lower corners and attach Tear & Tape adhesive along the outer edges as shown. 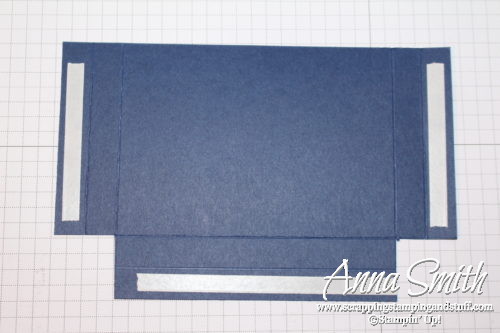
Fold on the score marks, remove paper backing from the adhesive, and fold as shown (this is flipped upside down from the photo shown above). 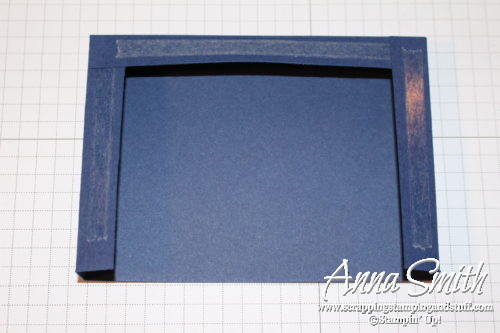
Attach the pocket you just created to the front of the first piece. 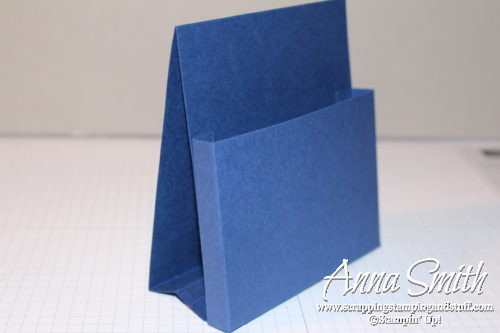
Next, score a 2 x 2 1/2″ piece of cardstock at 1/2″, 1″, 1 1/2″, and 2″
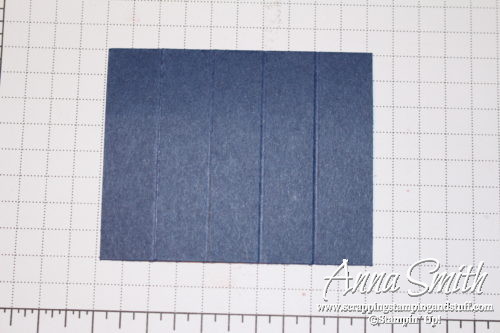
Place adhesive on one end, and fold up as shown.
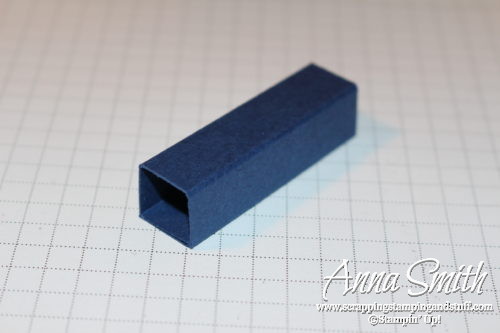
Add ribbon around the organizer, then attach the pen holder created above. Decorate with designer paper, calendar, and hot air balloon die cuts!

Please shop with me and combine these offers to get great deals!
- Use hostess code Z6N33NZN and I will send you a free gift!
- Earn a free Sale-a-bration item with every $50 you order!
- Sign up with Stampin’ Up! during Sale-a-bration and get a bonus of any two stamp sets for FREE!
- Keep track of your Stampin’ Rewards and earn free stamps from me!
- Any purchase of $150 or more will earn you hostess credit through Stampin’ Up!
- Join online stamp club and get free products and projects.
Order the products I used and make this project yourself!


Nice projects! Thanks for including the instructions! Great way to showcase both the Occasions & Sale-A-Bration catalogs!
Love this stamp set, and I love the calendar
Hi Anna! Such wonderful use of the Lift Me Up bundle…and the calendar tutorial is FABULOUS!
Anna, I just love your card and your project! I can’t wait to get my hands on that stamp set! Thanks for the directions on how to make the desk organizer! I’m definitely going to try it! 🙂
What great projects! Thanks for the tutorial as well. I’ll be coming back to this one, that’s for sure.
Great tutorial! I love the little pen holder on the side & cute matching card xx
Great projects!!! Love that little organizer!
Hey friend! Great card and project and thanks for sharing the details on the project. I also loved the color scheme that you pulled from the DSP.
Love your calendar/pen holder and kudos for a pic tutorial! Would make any desk more fun!
Love the organizer set! TFS!