The Stampin Up Mini Cut And Emboss Machine has arrived, and I am so excited to share it with you! We have been waiting, rather impatiently, for this awesome new craft tool to be released, and we don’t have to wait any longer! This mini machine is exactly what it sounds like – a smaller version of our Stampin Cut And Emboss Machine, and I think you’re going to love it. Below I’ll share everything you need to know to use one of these machines and decide if you want to add one to your crafting collection. Let’s get started!
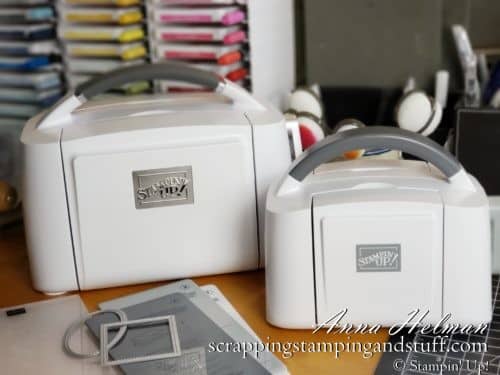
What is The Mini Cut And Emboss Machine?
The Stampin Up Mini Cut and Emboss Machine a small die cutting and embossing machine. Standard machines used for die cutting and embossing measure in the neighborhood of 9″ wide by 14″ long and sit about 8″ high. This mini machine is a super-adorable smaller version, and I’ll talk about it’s measurements below. It’s performance for die cutting and embossing is outstanding, and it will allow you to take your craft projects to a new level with the assistance of metal dies and embossing folders.
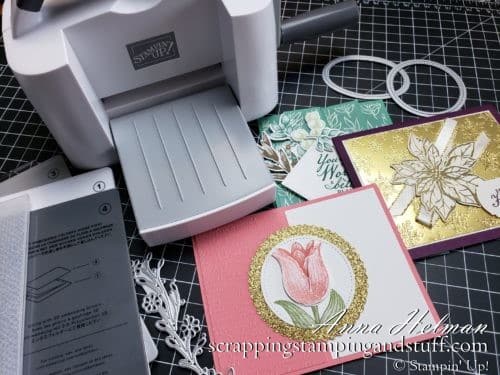
Mini Cut And Emboss Machine Video Overview
For a summary of the information I will discuss in this post, please watch along with this video I created. You may also keep reading for more info!
Let’s talk about die cutting and embossing for those who may be new to these techniques!
Die Cutting And Embossing Explained
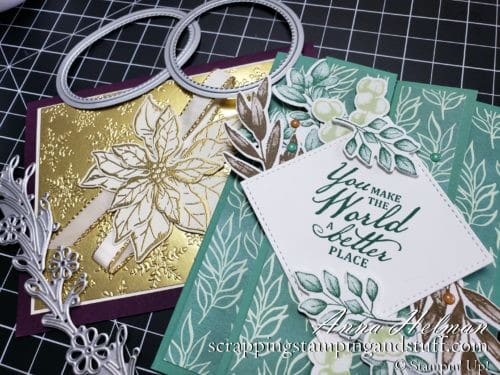
One of the main uses of this machine is cutting. Die cutting involves the use of thin metal dies which are used to cut paper into basic or intricate shapes. Newer style dies have the benefit of adding dots or stitching near the edges, which are a beautiful touch.
The second main use of the machine is to emboss paper. Embossing is a way to create patterns of raised texture on paper. By inserting a piece of paper into the center of a plastic embossing folder and running it through the machine, it will raise certain portions of the paper.
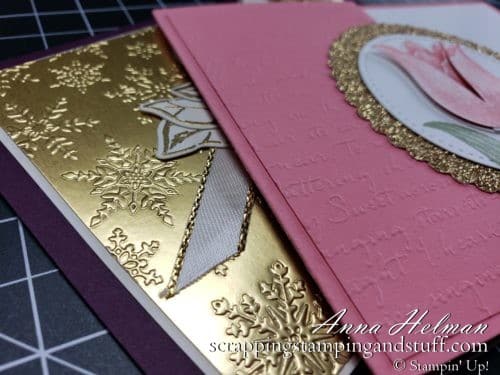
The embossing performed by this machine is called dry embossing, not to be confused with heat embossing.
Die cutting and embossing take basic craft projects and make them look truly professional. They allow you to get the ‘You made this?!?” response from your friends and family. Once you start using these techniques on your projects, you’ll wonder how you ever crafted without them.
How Large Is The Mini Stampin Cut And Emboss Machine?
First of all, it’s sooooooooo cute. It’s like a little clutch purse for your craft collection. It opens up for use, then folds shut into a little carrying case. Love it!
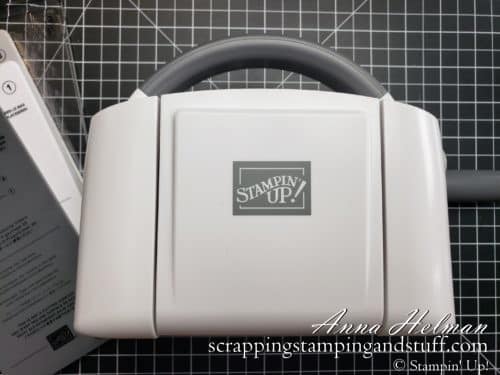
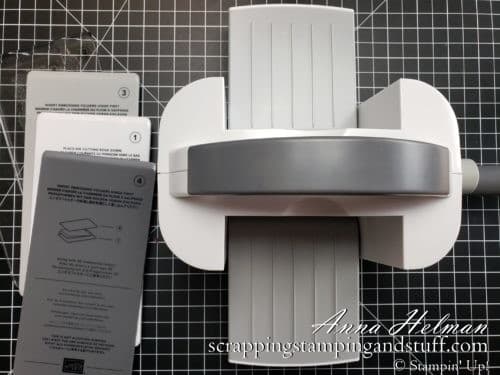
So how big is it? When open for use, the machine measures 7″ wide (plus a 3″ handle), 10 1/2″ long, and 6″ tall. When the sides are folded up, it measures 7″ wide (plus a 3″ handle), 4 1/2″ long, and 6″ tall.
Size Capability Of The Mini Machine
It’s also important to discuss how large the area is for cutting and embossing. The plates that pass through the machine measure 3 1/2″ wide by 7″ long. Dies and embossing folders less than 3 3/8″ wide will work on these plates.
Which Stampin Up Dies and Folders Will Fit?
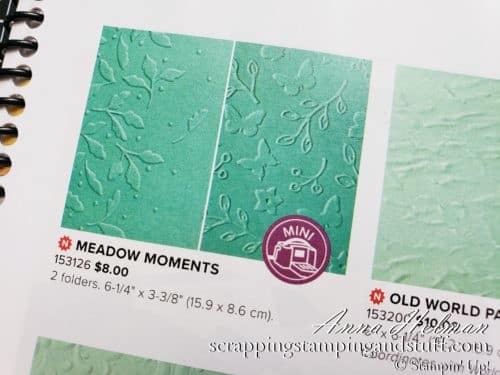
When browsing the Stampin Up website, check the product description to make sure the dies and folders are smaller than 3 1/2″ by 7″. When looking through our catalog, any products that are compatible with the Mini Cut And Emboss Machine will be labeled with the mini machine logo shown below.
So…do you need one of these machines in your craft collection? Let’s talk about it!
Why Get The Mini Cut And Emboss Machine Instead Of a Standard Machine?
The Stampin Up Mini Cut And Emboss Machine performs the same functions as the larger machine, but because it it’s size, it has a few benefits. Why would you want this machine instead of a larger one? There are three main reasons – cost, space-savings, and being travel-friendly.
Cost
The cost of the mini machine is just $60 compared to $120 for a standard cut and emboss machine. This is a wonderful cost-effective way to be able to create gorgeous cut and emboss details for your paper projects.
Space-Savings
Do you live in a small home? Don’t have a lot of space for storage? This mini machine can help you die cut and emboss, but save space at the same time!
Travel-Friendly
Do you take your crafting supplies on the road? Traveling with this machine is much easier because it is small and lightweight, weighing in at just 2.7 pounds. It fits easily in a small or medium sized tote bag, or you can just carry it with the carrying handle.
Why Get The Mini In Addition To A Standard Machine?
Do you already have a large cut and emboss machine? Are you wondering the advantages of also adding a mini machine to your collection? In my opinion, there are three main reasons you may want to do so.
Travel-friendly
As mentioned above, this version is easy to travel with, whereas the larger machine takes a little more work to carry along with you.
Easier to manage
If you’re going to cut or emboss something small, the mini machine is simply easier to manage. It takes less effort to crank, and it’s easier to pick up and move around in your work area. Why use the big one when the small one takes less effort?!
Double Your Productivity With Two Machines And A Helper!
Do you ever wish you had two machines so that you could use one while someone helps you with the other? This mini machine is a cost-effective way to have two machines in your collection. You better believe I’ll be putting my children to work with a second machine!
Let’s talk about features and benefits of the machine in a little more detail.
Mini Cut And Emboss Machine Features and Benefits
Here is what you can expect from the Stampin Up Mini Stampin Cut And Emboss Machine.
Plates Are Included And Numbered
All of the plates needed for cutting and embossing are included with your purchase of the machine. In addition, they are all numbered for an intuitive experience. The plates include diagrams showing you exactly which plates to use depending on whether you are die cutting or embossing.
Fold Up Sides
The sides of the machine fold up when not in use. This is a huge benefit, because it allows the machine to take up even less space on your craft table, and also make it easier to travel with. Just carry it with the ergonomic handle or put it in a tote bag and go!
Anti-Skid Feet
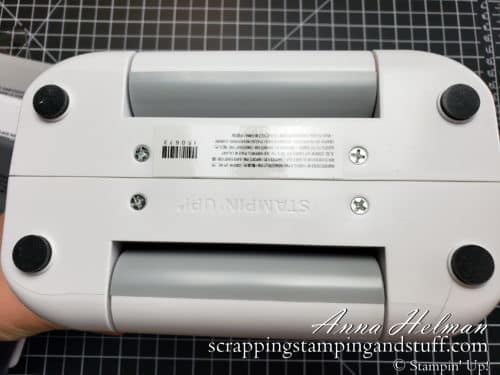
Four anti-skid feet will keep this machine in place on your craft surface. If you find it to be sliding around, just wipe the feet with a damp rag and let them dry. They’ll be perfectly grippy again!
Solid Steel Construction
Solid steel construction means that your machine is well-built, durable, and the parts won’t change over time. Years from now, it will be working just the same as it is on day 1.
Beautiful Appearance
This machine is beautiful. It has a sleek appearance with white, gray, and silver accents. I love the metal Stampin Up plate and how it looks when folded closed. Gorgeous! Plus, it coordinates perfectly with our larger machine – it’s like a matching mama and baby!

Convenient Size
The small size is so nice! It takes up less space on your work table, is much easier to store, and is easy to take along when traveling.
How To Use The Mini Cut And Emboss Machine
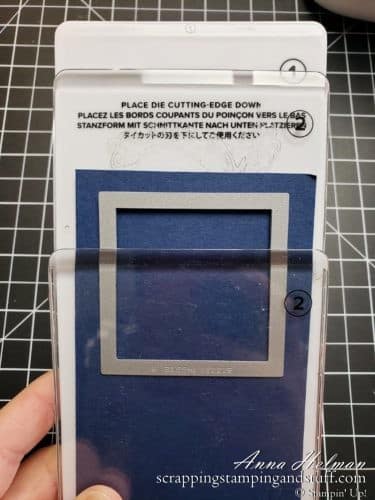
To use the machine, you will ‘build a sandwich’ of plates and dies (or embossing folders) to crank through the machine along with your paper. Here you can see that the plates include diagrams explaining which ones to use for different purposes.
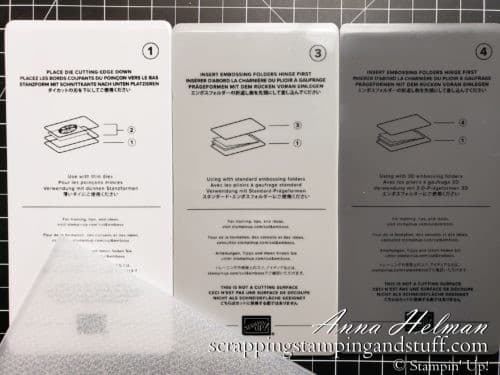
For die cutting, you need plate 1 and both 2’s. Your paper and dies go on top of the first plate 2, and the other 2 plate goes on top. Remember to always use your plates this way to prevent them from warping.
For embossing with standard (thin) folders, you need plate 1 and plate 3. The embossing folder and paper go between 1 and 3.
For 3D embossing folders, you need plate 1, then your folder with paper inside, then plate 4.

Align the plates so they are all directly on top of one another, set them on the platform of the machine, push them into the opening, then begin cranking. Once the plates begin to feed through the machine, let go of the them and secure the machine with your other hand using the top handle.
It’s that easy. After you use this machine a few times, you’ll catch on and not need the diagrams anymore. Remember, you can watch along as I show exactly how to use it in the video at the top of this page.
As wonderful as the other aspects of this machine are, the single most important is how it performs. Let’s discuss!
Mini Machine Performance
I am just as happy with the die cutting and embossing of this machine as I am with my large machine…and that means I love it! I am so very pleased with the performance of this machine, and I fully believe you will be as well.
Last but not least, let’s talk about the cost of the Mini Cut and Emboss Machine.

Cost And Options For Savings
The cost of this machine is just $60! This is a minimal investment considering the beauty that will be added to your projects through die cutting and embossing.
Would you like a way to save money or earn rewards on the purchase of your new machine? You have two options.
- Purchase the Stampin Up Starter Kit, and you can choose $125 in products for just $99. You’ll get free shipping, a few other goodies, and from then on, you can order your supplies at the demonstrator discount. Learn more here or contact me if you’re interested.
- If you bump your order up to $150, you’ll earn hostess rewards through Stampin Up! You’ll also earn rewards from me personally for my Stampin Rewards program. I keep track of your points and notify you after each purchase with your total. When you fill your card, you’ll get the stamp set of your choice for free!
This machine will be available for customer ordering January 5, 2021! Choose the Starter Kit option above and you can order yours today!
Thank you for joining in for today’s introduction to the Mini Stampin Cut And Emboss Machine. This machine is adorable yet powerful. I recommend it for any crafter’s collection!
Contact me with questions. Order here or join my team and get yours at a discount! Happy cutting and embossing!!
Don’t Miss Out!
Please make me your Stampin’ Up! demonstrator! Earn rewards points towards free stamps PLUS a gift when you order. Use host code: X2Y272H2 PLUS, with your first order, you’ll receive free catalogs in your thank you package!

Order This Product Here:
You Might Also Like:

I was hoping to leave a message below your video for the giveaway today, and the comment link brought me here. I m not sure if I’m in the right place!
Anyway, please enter me in the giveaway. I just recently discovered you and enjoyed your video on the gilding flakes…so many ways to use them!! I look forward to watching more of your videos.
Thank you Fran! I’m glad you’re enjoying my videos. You’re entered to win!
Hands down this is the best and truest description of the machine! Nothing cuts as good! Please enter me in the drawing.
Yes!! Thanks for entering!
I love my cut and emboss machine and would love to have the mini. Please enter me in the drawing.
What a generous giveaway! I own the full size machine and love it, so I’ve been wavering about owning this one. Great write-up, you’ll be convincing everyone they need one Ka
It’s such a handy little tool. Thank you Kathe!
Hello, I’m knew to your YouTube and a knew customer. Love your videos and many ideas you have . Yep, I binge watched within these few days that I found your classes. Thank you and have a blessed day .
Thank you so much Maritza! I appreciate you!
Thank you for making things clearer for me. I appreciate you so much!
Thank you Nancy!