If you’ve stopped in lately, you have heard me talking about my daughter’s third birthday which was this past weekend. We had a farm birthday party theme, and I wanted to share some pictures! I always look online for party ideas, so I want to share ideas back with all of you!
Here’s the birthday girl with her momma. A month ago I couldn’t get her to smile for a picture for ANYTHING. Now she does this cheeseball smile. What a goof.

These were the invitations I sent out a few weeks ago. For more pictures and information on making them, click here.

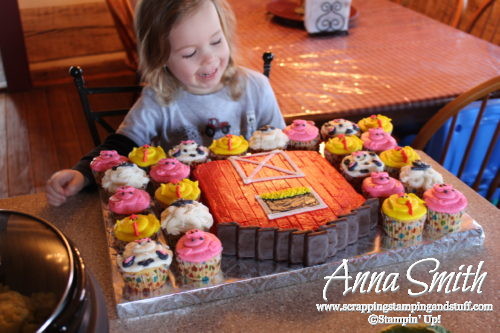
Let’s get to my favorite part…the cake. I made this barn cake along with the farm animal cupcakes. I found inspiration from different websites and this is what I created.

Kelsey wasn’t home when I decorated the cakes. This is her seeing her cake for the first time. She loved them! She immediately wanted to eat a pig cupcake.

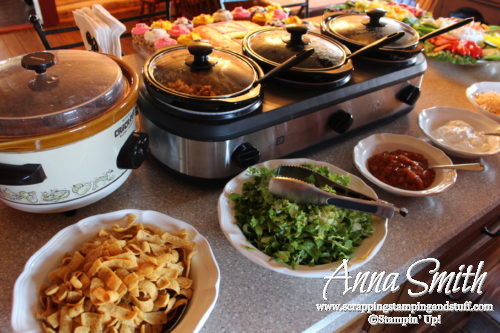
I usually don’t do any crafts or much in the realm of decorating for her parties, but I like to do themed food. These were the fixings for ‘haystacks,’ including corn chips, taco meat, rice, beans, corn, lettuce, salsa, sour cream, cheese, and taco sauce.

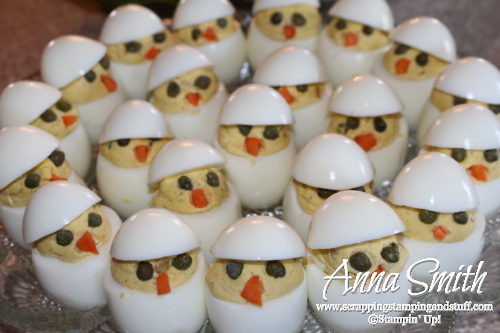
Here are the hatching chick deviled eggs I made.

If you decide to tackle making these deviled eggs, here are a few tips:
- When I cut the top of the egg off, I aimed to cut off about 1/3 of the egg. Sometimes this would cut through the yolk and sometimes not. If not, I then had to cut down into the egg to allow me to see the yolk. I used a table knife to ‘dig’ out the yolk. This took a little patience.
- I mixed up the yolk filling, then put it in a pastry bag. This made it a snap to fill them up. It seemed like a much better option than struggling to fill them with a spoon.
- The eyes were made of capers, which you can find beside olives in the grocery store. Dry them off before adding them to the eggs.
- The beaks were small pieces of carrot.
- If you have an egg tray in your refrigerator, that might be a good way to prop them up for display. If not, I figured out a couple tricks to get them to stand up. First, dry them off completely with a paper towel. Any amount of water will make it a losing battle to get them to stand up. Second, I sliced a small bit off of the bottom of each egg to make it flat. This was a huge help.
Next up, the ‘garden’ relish tray. I just placed everything on top of some romaine lettuce.

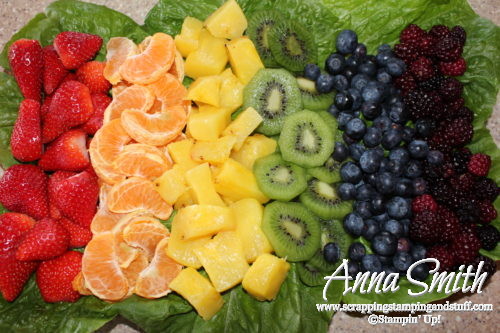
And here is the rainbow fruit tray.

Last but not least, here’s that beautiful birthday girl while we sang Happy Birthday. She is just the most wonderful thing ever. I think I’ll keep her 🙂

If you’re new to my website, you should cruise around a bit and see some stamping projects! Here are some good places to start: Paper Pumpkin craft kits, Oh Happy Day card kit, and a scrapbook page idea.
Please shop with me and combine these offers to get great deals!
- Use hostess code H3N6K46A and I will send you a free gift!
- Earn a free Sale-a-bration item with every $50 you order!
- Sign up with Stampin’ Up! during Sale-a-bration and get a bonus of any two stamp sets for FREE!
- Keep track of your Stampin’ Rewards and earn free stamps from me!
- Any purchase of $150 or more will earn you hostess credit through Stampin’ Up!
- Join online stamp club and get free products and projects.
It looks like a wonderful party. and she is just soooo adorable.
Everything looks great! I’m wondering if you could share tips and tricks on the cupcakes?! I’m hoping to tackle similar for my sons first birthday.