If you’ve been stamping and making cards or other papercrafts for long, it is likely that you’ve experienced the problem of having an ink pad too wet or juicy. This is so frustrating! If you’re using rubber stamps or those with larger designs, it may not cause much of an issues, but with more detailed designs it can completely ruin them when you have too much ink present. Today I have a quick and easy solution for you, so keep reading for more info!

Causes
Sometimes when you get a new ink pad, it is just teeming full of ink. Maybe a little too much ink. The other cause is when you re-inked the pad, you added more than you should have. I have never done this…hehe just kidding.
Resulting Problems
When your ink pad has too much ink, it can make your stamped images look fuzzy or blurry, since the excess ink bleeds outward from the stamped image. The ink can also fill in areas that are supposed to be open, such as the centers of letters like ‘b’ or ‘o.’
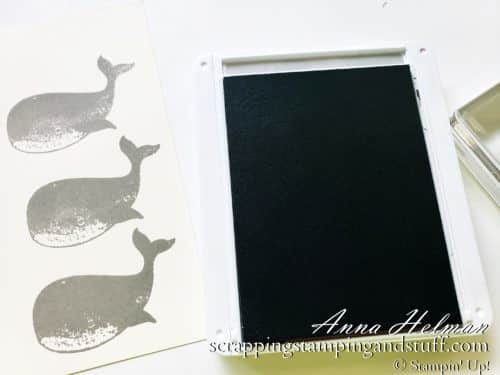
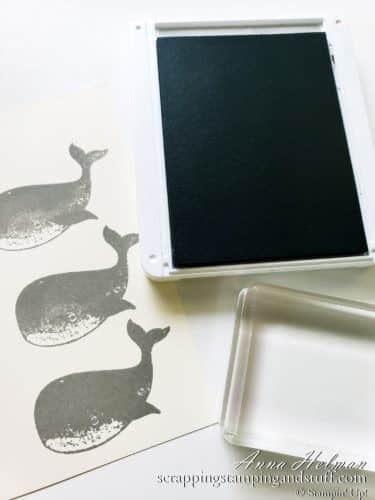
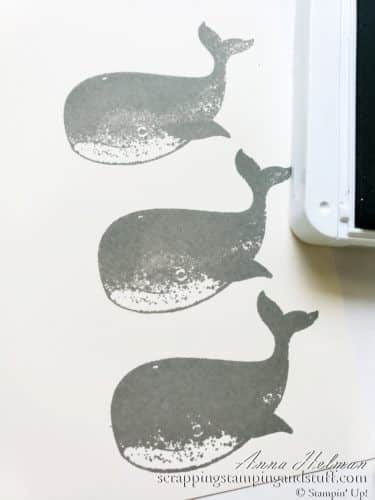
On Stampin Up Distinktive stamps, natural shading is created using a stippling effect, or small dots of color and non-color (or openings). Too much ink means the openings are often filled with ink, which ruins the effect. See in the photo below that the whale at the bottom is mostly solid? It isn’t showing the variation in shading that it should as a result of too much ink on the stamp. The whale at the top looks much better, as a result of using the tip I’ll share below.

My Previous Solution
My previous solutions to this problem were to 1. Choose a different color of ink or 2. Soak up the excess ink with a paper towel. Option two is not very fun. It’s also messy and wasteful. You paid for that precious ink for goodness sake! Never fear, now we have a better way…
The Quick Fix
Luckily, you don’t have to soak the excess ink up using a paper towel. Here’s what to do when your ink pad is to wet and juicy:
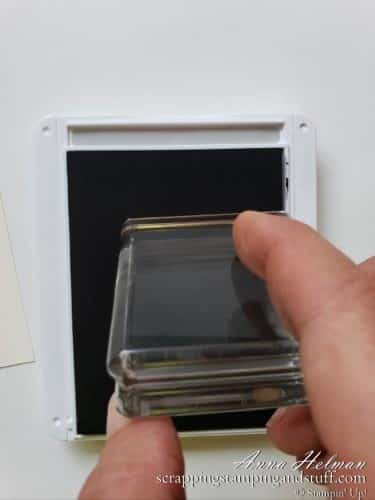
- Grab an acrylic block (a larger block is better than a smaller one)
- Place it on the surface of the pad near one edge
- Press the block down into the pad
- Pull block towards the opposite edge of the pad
- Repeat a few times.

Doing this moves ink from the main area of the pad and ‘pulls’ it towards the edge. When you ink your stamp, use the main area where you removed ink from. It works perfectly. Go ahead and try it!

Video Tutorial
Watch along below as I show exactly how to remove excess ink from your stamp pads.
Thanks for visiting! Now you know exactly what to do with an ink pad too wet and juicy. Do you have questions or problems when it comes to crafting? Let me know, and I’ll do my best to answer them!
Please make me your Stampin’ Up! demonstrator! Earn rewards points towards free stamps PLUS a gift when you order using August host code: P7URKZUU. PLUS, with your first order, you’ll receive free catalogs in your thank you package!

Sign Up For My Upcoming Virtual Card Classes!
I am facing the same issue with the ink pads I am using for my stamps. Thanks for letting us know how to solve it.
You’re welcome!
Hi there! I am new to card making so I got a set of small test ink pads. I think they have too much juice since when I have tried to use them, the ink that gets transferred on the stamps is bubbly. Will the tip you outlined above work for small pads of ink since I don’t have enough space to push the excess ink anywhere?
Thanks!
Awesome tip!
Thank you!