Happy Monday! What better way to celebrate a Monday, than with a fun fold card tutorial?! I love trying out different card folds, and I know that many stampers do as well. For this reason, I will be sharing more in the future. Today we will start with a very simple card fold – the double gate fold card. I hope you’ll join in the fun!
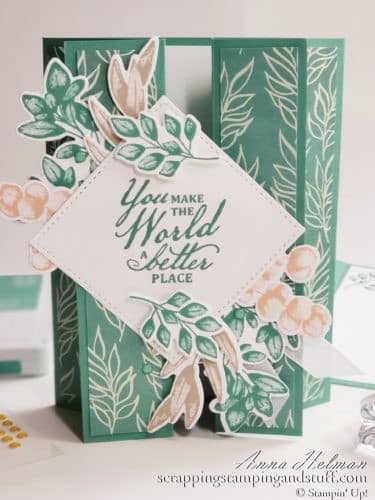
What Is A Double Gate Fold Card?
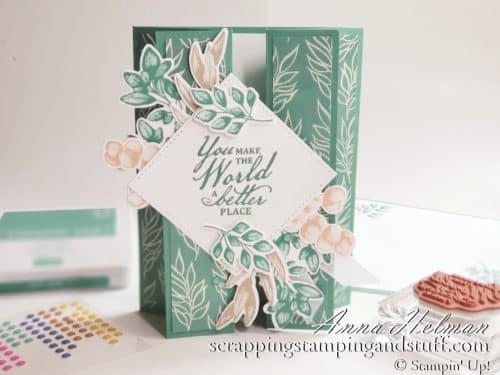
This type of card fold is one where the front of the card opens from the center outwards to both sides. With a regular gate fold card, you have a single flap that opens to the left and one to the right. With a double gate fold, there is an extra fold on each side that can be extended outward as you open the card.
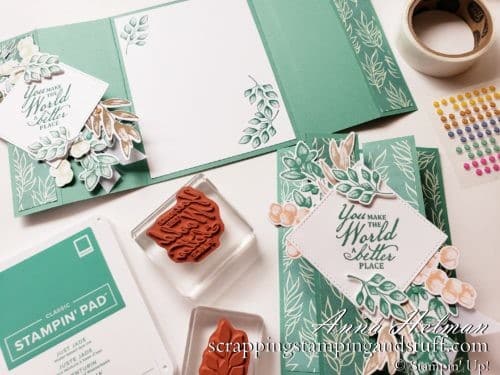
How To Make A Double Gate Fold Card
Video Tutorial
Are you a visual learner? If so, watch along as I share my tutorial video with you.
Materials Needed
To make this double gate fold card, you will need the following:
- 5 ½” x 11” Just Jade cardstock
- 4” x 5 ¼” Whisper White cardstock
- 2 – 1” x 5 ¼” Forever Greenery designer series paper
- 2 – 1 7/8” x 5 ¼” Forever Greenery designer series paper
- Extra white cardstock for stamping
- Flowers For Every Season ribbon
- 2020-2022 In Color Enamel Dots
- Assorted adhesives including Seal+, Mini Glue Dots, Multipupose Glue and Foam Dimensionals
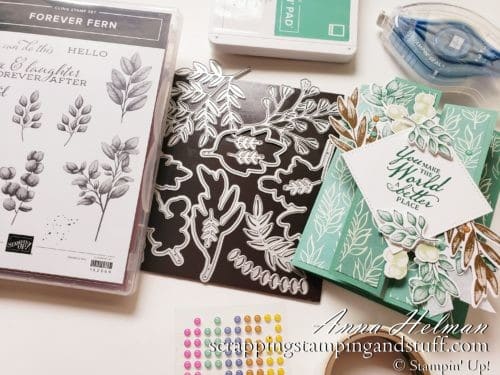
Preparation
Place the 5 ½” x 11” cardstock horizontally on your scoring board, and score it at 1 ¼”, 3 3/8”, 7 5/8”, and 9 ¾”. Crease the card on each score line and use a bone folder to burnish it so that it lays flat.
Cut a white square using the Stitched Shapes dies. Stamp a greeting on it.
Stamp ferns from the Stampin Up Forever Fern stamp set onto white cardstock, then cut them out using the Forever Flourishing dies. Ink colors shown on the cards include (right) Petal pink, Crumb Cake, and Just Jade and (left) Soft Suede, Soft Seafoam, and Shaded Spruce.
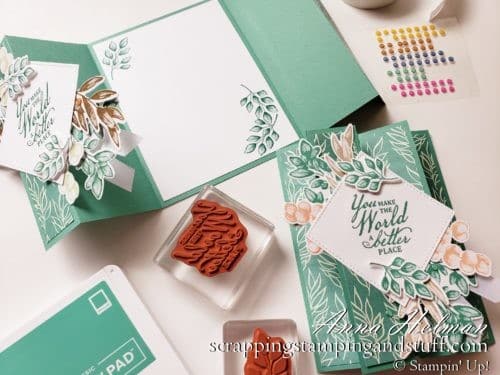
Assembly
Attach the designer paper strips to the front flaps of the card and the white cardstock piece to the inside.
Place one glue dot at the base of each fern. Arrange three ferns pointed upward in a clump, and then lay the square on top and press down to adhere. Repeat with another clump of ferns pointed downward for the bottom right side. Attach this piece using strong adhesive to the front left flap.
Add a piece of Flowers For Every Season ribbon and some Just Jade In Color Enamel Dots.
This is such a simple and pretty card fold. I hope you’ll try it out soon!
Please make me your Stampin’ Up! demonstrator! Order from me using the product links at the bottom! Earn rewards points towards free stamps PLUS a gift when you order using July host code: 6XFARQP4. PLUS, with your first order, you’ll receive free catalogs in your thank you package!

Holiday Catalog Product Shares Available For A Limited Time Only!

Sign Up For My Upcoming Virtual Card Classes!
Order the products I used and make this project yourself!


[…] How To Make A Double Gate Fold Card […]