Hi! Welcome to my blog, and I’m so glad you’re here. I love to craft, scrapbook, make cards and share great information and tips whenever I get the chance. Today, I have a wonderful tip to share that has to do with mini embossing folders. Do you have any mini EF’s in your collection? Do you ever wish you could emboss a full card front with them, even though they aren’t that large? Keep reading and I’ll share exactly how to do this!

Our line of small embossing folders is designed to work with our Mini Cut & Emboss Machine. Let’s talk about it for a minute.
Mini Cut & Emboss Machine and Mini Embossing Folders
The Mini Cut & Emboss Machine is just like the regular-size Cut & Emboss Machine, but smaller! The Mini Cut & Emboss machine is great for traveling and crafting on the go. It’s easy to pack up and take to a friend’s house or cardmaking class. It’s also great for you if you do not want to invest in the regular-size Cut & Emboss Machine. I’ve written some detailed blog posts about both the mini and standard machines. Take a look.
Click here to learn more about Stampin Up’s Cut & Emboss Machine.
Click here to learn more about Stampin Up’s Mini Cut & Emboss Machine.
Why Emboss with a Mini Folder?
You might be asking: Why emboss with a mini embossing folder when I have a regular-size machine? Great question! As you look through the 2021-2022 Annual catalog, you’ll notice on pages 154-155 all the embossing folder options. You’ll also notice that not all of the options are offered in the larger size embossing folder. There are 6 folders only offered as a mini embossing folder. So, what if you love a pattern or design of one of the mini folders, but you have a regular-size machine? Keep reading and I’ll share my tip on how to emboss a full card front with a mini embossing folder.

How to Emboss a Full Card Front with a Mini Embossing Folder
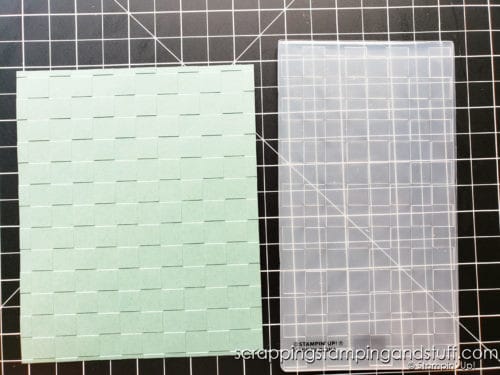
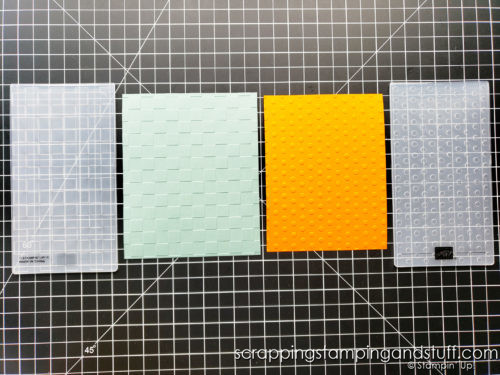
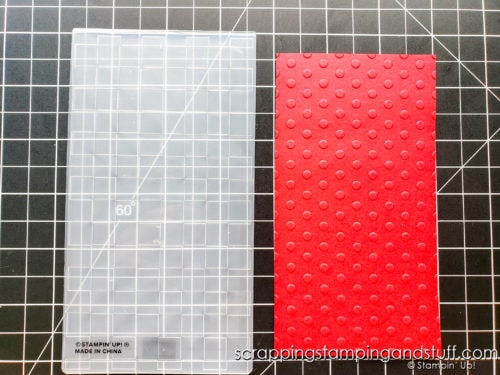
When using this technique, be sure to use a mini embossing folder with a symmetrical, uniform pattern because it will not work with irregular designs. In my sample, the mini embossing folders I used were from the Checks & Dots set.
When running a piece of cardstock through the Cut & Emboss Machine with a mini folder, insert your paper into the folder and leave one edge of the paper hanging out. Turn the folder sideways and leave the extra paper hanging out the side closest to you. Layer your plates as needed and begin cranking the cardstock and folder through, but not all the way. Stop before the last edge of the folder goes through the machine. Crank the handle the other way to reverse the folder out.
Next, open the mini folder and readjust the cardstock inside. Shift it to the side, so that the un-embossed area is now inside the folder. Line up the patterns on the cardstock and folder. Run it through the machine again the same way as before – making sure not to allow the last edge of the folder to run through the machine.

Want to see exactly how I did this? Take a look at the video below!
Mini Embossing Folder Tip Video
I’ve created a video with all the steps on how to emboss full card fronts with a mini embossing folder. Click on the video below to follow along!
I hope this is helpful. Thanks for visiting today!
Don’t Miss Out!
Please make me your Stampin’ Up! demonstrator! Earn rewards points towards free stamps PLUS a gift when you order using host code: ZGRQXUTW PLUS, with your first order, you’ll receive free catalogs in your thank you package!

Order These Products and Start Embossing Full Card Fronts with a Mini Embossing Folder Yourself!
You Might Also Like:
How To Emboss A Slimline Card & Beautiful Butterfly Wedding Card
Thanks for joining me today. I hope you’ve enjoyed this hack on how to emboss a full card front using a mini embossing folder!


Leave a Reply