Welcome to our July OSAT Blog Hop – Pretty In Pink! I had to stretch myself for today’s projects, because I haven’t been in a ‘pink’ mood lately, but I came up with a project that I love. You’ve heard of shaker cards, right? Have you heard of water shaker cards, or more specifically, ones filled with gel that look like water? Keep reading, and I’ll explain more!
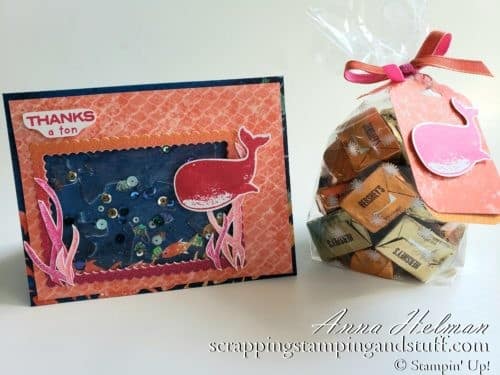
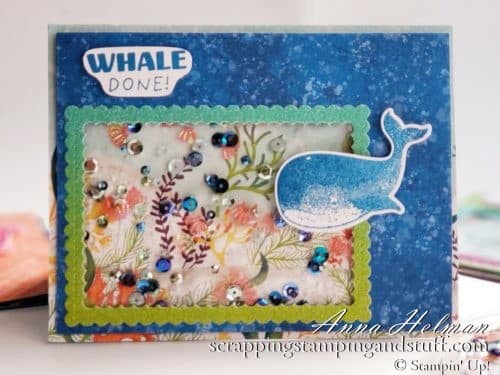
Here is my project for today, an adorable water shaker card along with a coordinating treat bag.
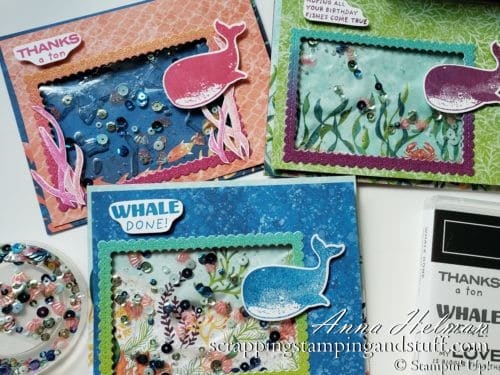
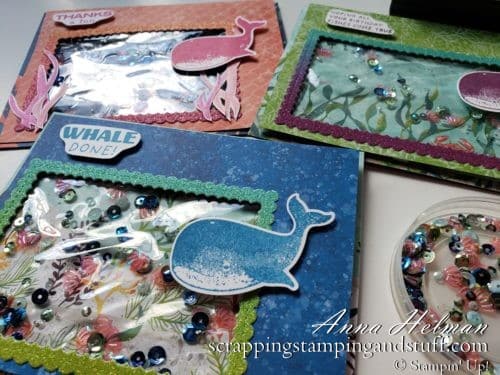
I really like how the ocean scene turned out using three shades of pink – Melon Mambo, Calypso Coral, and Flirty Flamingo. I made three different versions of the card, and many of the pictures below are of the cards I made in other colors. Aren’t these fun?!
The Stampin Up Whale Done Bundle
Below you can see the Whale Done stamp set that I used for these cards. One of my favorite things about this set, besides the fact that it is completely amazing, is that it can be used for men, women, and children. How many stamp sets can you say that for?
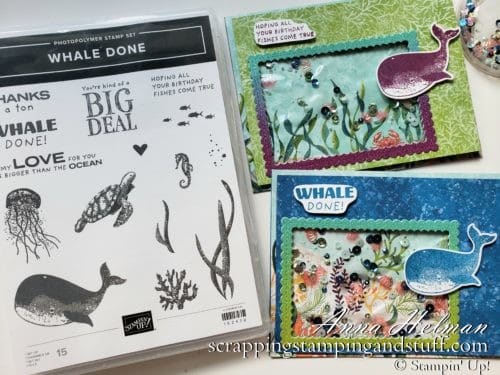
I can’t forget to mention that this set has a coordinating Whale Builder Punch. Woohoo!
Would you love to see these cards live and also learn how to make a gel water shaker card? Watch along below or keep reading for photo instructions.
Did you see how the gel moves in these cards? So fun!

Let’s get started and I’ll show some photos and written instructions.
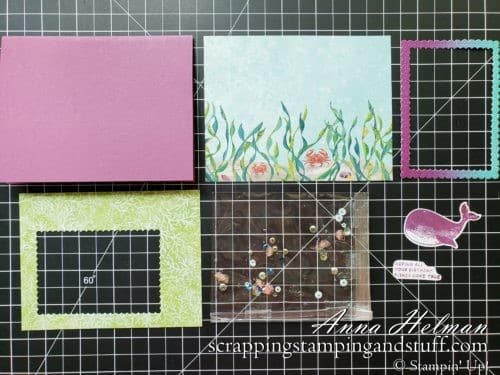
Materials Needed
To make this card, you’ll need the following materials which are pictured below:
- 5 1/2″ x 8 1/2″ Rich Razzleberry card base, folded in half
- 4 1/4″ x 5 1/2″ Whale of a Time designer series paper for background
- Frame cut from Rainbow Glimmer Paper using the two largest Stitched So Sweetly dies
- 4″ x 5 1/4″ Whale of a Time designer series paper, with a piece of cardstock mounted to the back side, then die cut with the second largest Stitched So Sweetly frame
- Clear envelope
- Hair gel
- White cardstock
- Ink colors of your choice
- Whale of a Time sequins
- Assorted adhesives including Tear and Tape adhesive, dimensionals, and Seal+
How To Create the Gel Pocket
To create the gel pocket, you’ll need to squeeze approximately one tablespoon of hair gel into the bottom of a clear envelope. Add about one teaspoon of sequins.
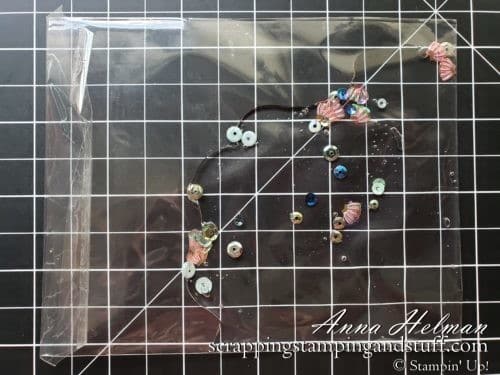
Press and mix the gel and sequins until they fill the bottom part of the envelope and most of the air pockets are removed. Seal the end of the envelope using the flap, then fold it over two more times and attach in place with scotch tape. Fold one of the adjacent sides over two times and tape it in place.
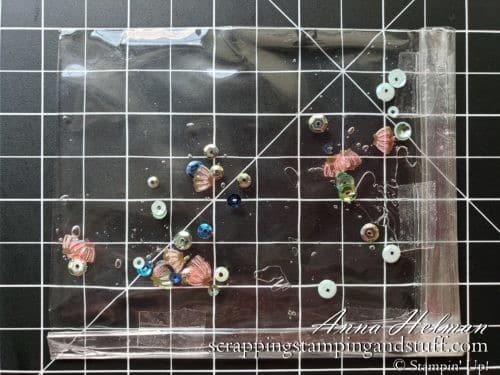
Assembling The Card
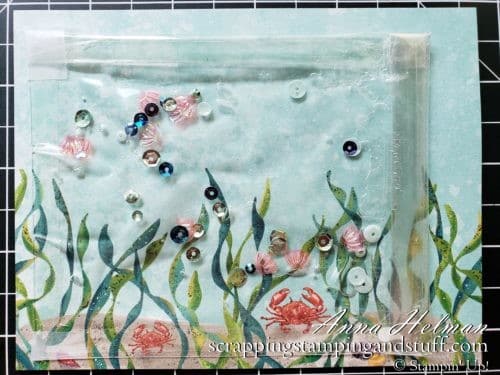
Now it’s time to assemble your water shaker card! Attach the 4 1/4″ x 5 1/2″ designer paper directly on top of the card base. Then, on the bottom side of the clear envelope, place Tear and Tape adhesive along each of the four edges. Remove the paper backing, and place it approximately 1/4″ from the bottom and left edges. Make sure the folded edges of the envelope are on the top and right sides.
Get the designer paper with a frame cut out. Place dimensionals along the narrow edges and Seal+ across the rest.
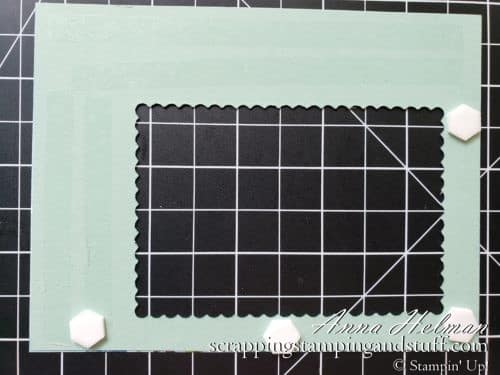
Attach to the card front so that the gel pocket shows through the opening. Next, glue the glimmer paper frame on top.
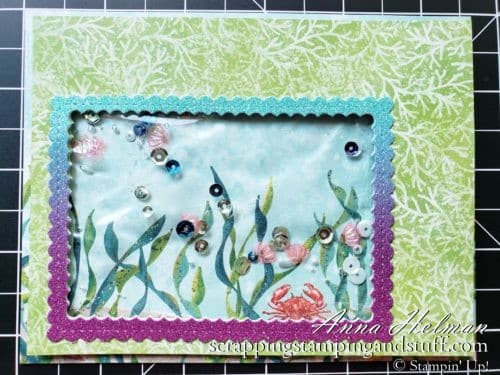
Finishing Touches
Use stamps from the Whale Done stamp set as well as the Whale Builder Punch to decorate the card.
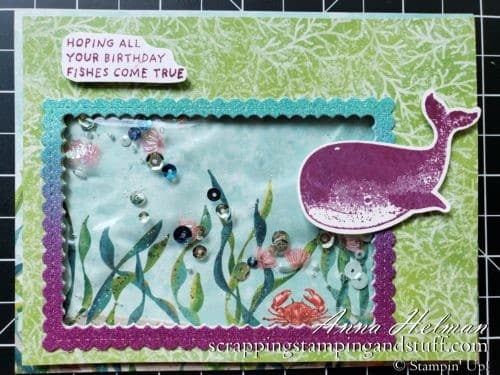
Here is one last view of my pretty in pink version of this water shaker card and treat bag. I hope you liked today’s tutorial. Please stop back to visit soon!

Continue through the blog hop to see more amazing pink projects!
Please make me your Stampin’ Up! demonstrator! Order from me using the product links at the bottom! Earn rewards points towards free stamps PLUS a gift when you order using July host code: 6XFARQP4. PLUS, with your first order, you’ll receive free catalogs in your thank you package!
Holiday Product Shares Now Available
Sign Up For My Upcoming Virtual Card Classes!
Order the products I used and make this project yourself!


Your watercolor card is so cool!!
Thank you Lisa!