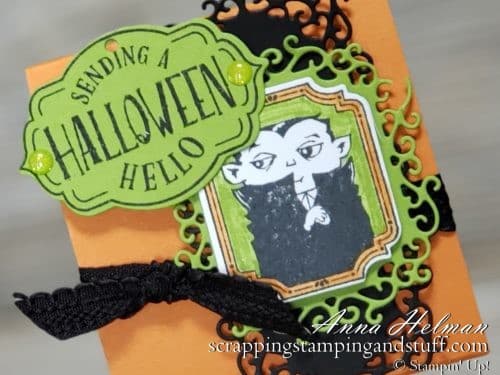
Hi everyone and welcome to Day 2 of DIY Halloween Treats Week! I decided it would be really fun to share a week’s worth of Halloween treats with you, so here we are on Day 2. If you missed Day 1, you can see them here. I have many more fun projects to share later in the week, so make sure to subscribe to my blog and stop back in to see the rest! Today I have a decorated sucker to share with you. It is oh-so-spooky. I even have a quick tutorial so you can make these yourself!
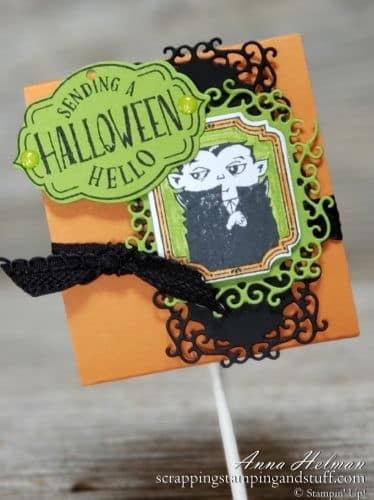
I decided to use two of our stamp set and die bundles to decorated this spooky sucker – Tags Tags Tags and Spooktacular Bash. Links for these products are at the bottom, and I also have information about the Tags Tags Tags Bundle on my Class In the Mail page, because it is the center of my current class offering! Right now you can get the Tags Tags Tags stamp set and dies PLUS materials and tutorials for three pre-designed cards for a great price! Check it out!
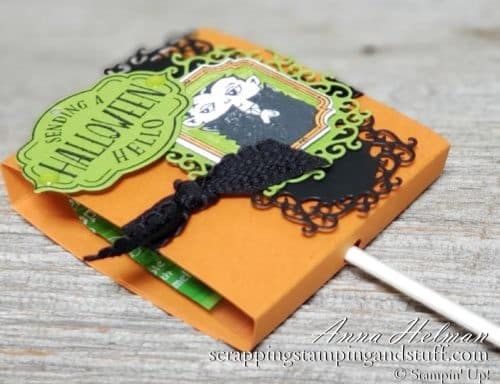
If you would like to make some of these decorated sucker treats, keep reading for instructions. I designed these to work with Caramel Apple Pops, but they would also work with other large and flat suckers as well. To decorate smaller suckers you would need to scale down the measurements.
First, you need a piece of cardstock that measures 2 3/4″ x 8″. Place it horizontally, and score at 1 1/2″, 2″, 5″, and 5 1/2″.
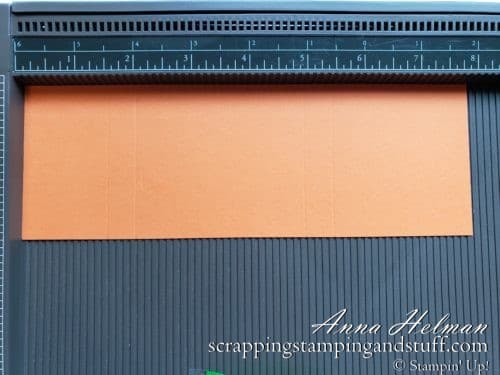
Next, punch a hole for the sucker stick in between two of the close score lines.

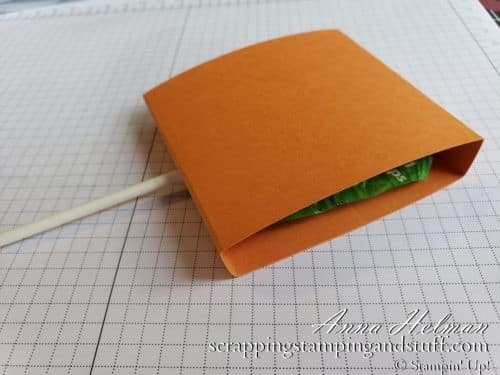
Fold on the score lines to loosen them up. Then insert the sucker stick through the hole, fold it up, and add adhesive to one of the loose ends. Press to adhere, and the sucker is ready for decorating!
Thanks for visiting to see this decorated sucker and tutorial! Stop back for more spooky sweet treats all week long!
Please make me your Stampin’ Up! demonstrator and order from me using the product links below!
- With your first order, you’ll receive a FREE annual catalog from me! Seasonal catalogs are also mailed to regular customers.
- Please use hostess code GJNKWZVN when you order.
- Keep track of your Stampin’ Rewards and earn free stamps from me!
- When you order $150 or more, you’ll earn hostess credit through Stampin’ Up!
- Sample all of the papers, ribbons, and embellishments that Stampin Up has to offer with Product Shares.
- Check out my current Project in the Mail, Tags Tags Tags (shown below)!

Order the products I used and make this project yourself!


Leave a Reply