It’s been the heat of summer here in Indiana, and you know what I think this week is a good week for? Staying INSIDE and doing some coloring! I’m sharing about Blends alcohol markers all this week, and today I’m starting with 3 basic blending techniques that are simple enough for anyone to try.
Alcohol Marker Blending Techniques Video
Watch along here as I demonstrate these 3 blending techniques, or keep reading for details.
Intro To Alcohol Markers
If you aren’t familiar with alcohol markers, I encourage you to check out this complete introduction here. By using these markers, you can get rich colors and blend them together for life-like shaded images.
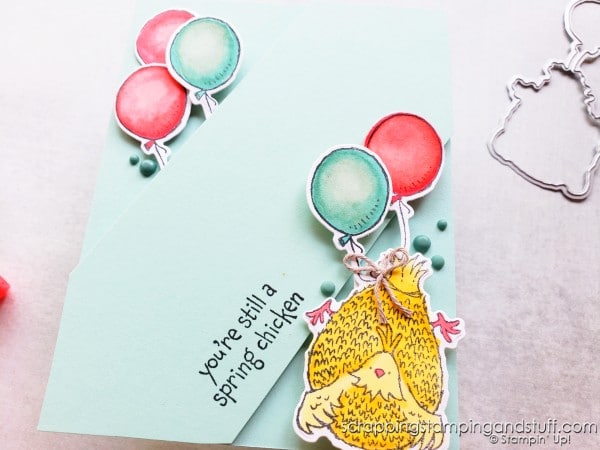
Alcohol Marker Project Samples
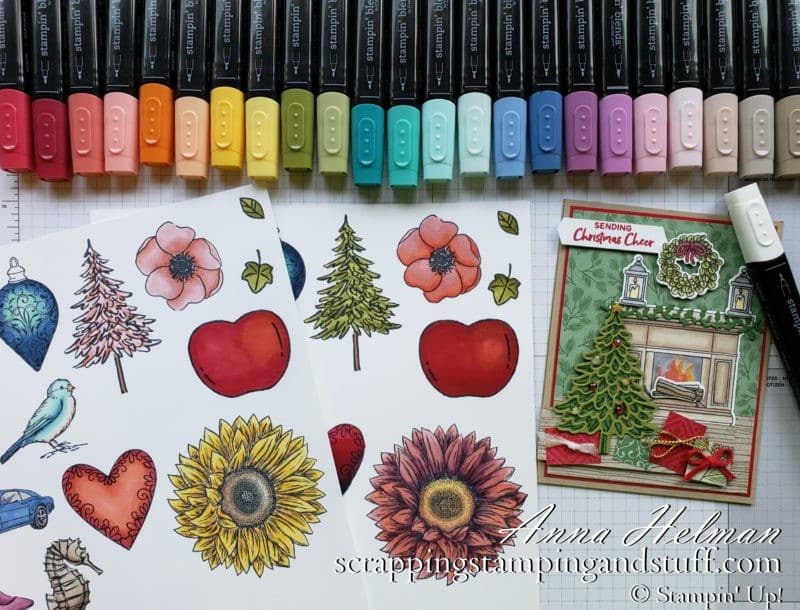
Here are a few projects I’ve colored in the past with alcohol markers. Every time I do a coloring tutorial, I think I mention that I’m not a huge fan of coloring…but I do love to color with these markers. The result is just so pretty!
Now let’s talk about how to blend using these markers!
Basic Blending Technique
For all the techniques below, I’ll describe how to blend the darker colors into the lighter colors. Before I get to this step, I usually color the entire area with my lightest color, then add some of the medium color (if I’m using 3 colors), then add a little of the darkest color. After I have done this, I proceed with the blending technique as described below.
Blending Technique #0 – Just Color
Ok, this is a bonus (ha) technique for you. If you’re new to alcohol markers, just color and see if you like the results. These markers are so rich and vibrant, and you don’t have to blend colors to get a gorgeous result.
Now we’ll get to the real blending techniques…
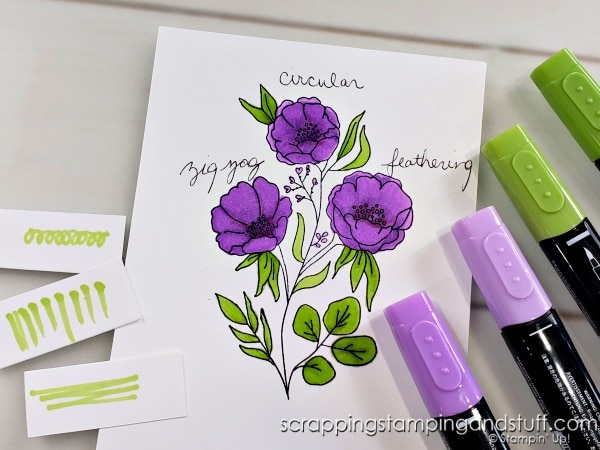
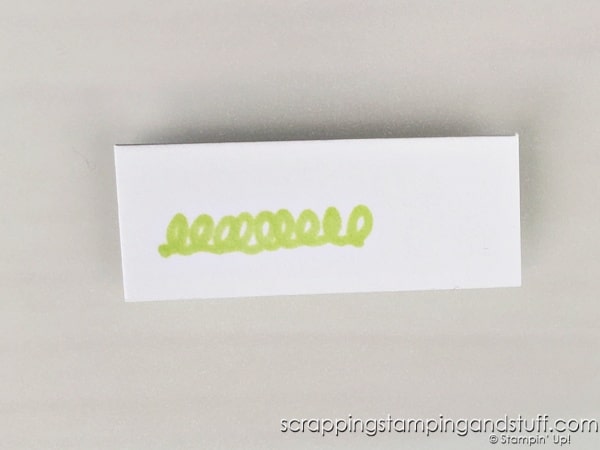
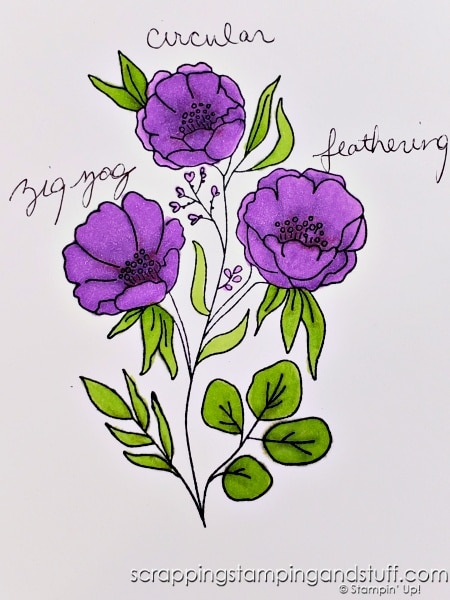
Blending Technique #1 – Circular
Start in the darker area with a lighter marker, and use a circular motion to first cover the darker area, then move towards the lighter area until you have covered it with little circles of ink.
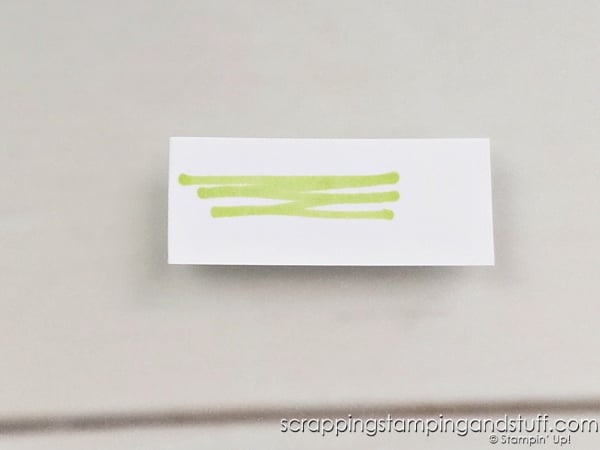
Blending Technique #2 – Zig Zag
Start in the darker area with a lighter marker, and use a back and forth, zig zag motion to cover the darker area, then move to the lighter area.
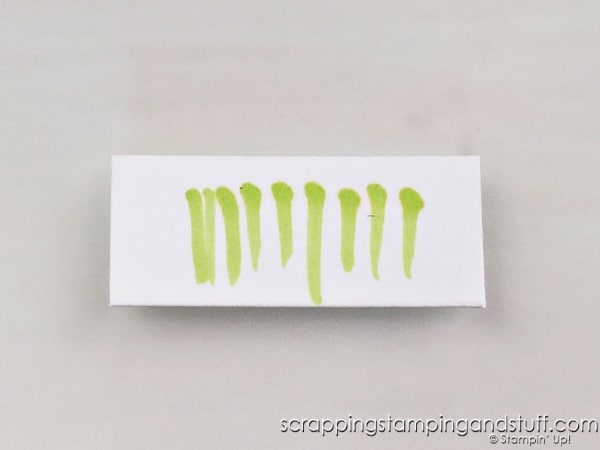
Blending Technique #3 – Feathering
For this one, grab a lighter marker and put the marker tip fully down in the darker area. Drag the marker towards the lighter area and while doing so, lighten the pressure until the marker is no longer in contact with the paper. Do this repeatedly until the entire area has been covered.
The Results
When I first started using Blends markers, I used a circular motion, but I’ve grown to love the feathering technique. I encourage you to try these out and see which works best for you!
Now let’s see the results of my comparison of the three techniques.

Here is a close-up of the results. Can you tell a difference, or not really?
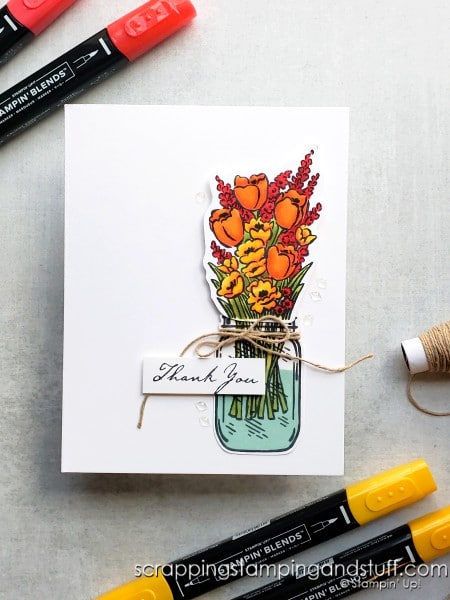
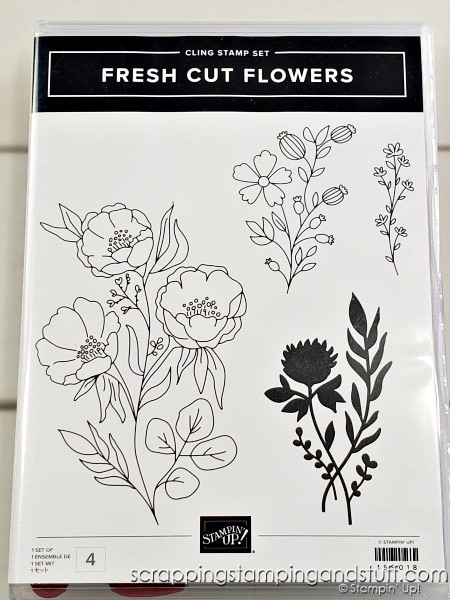
The flower stamp I used is from the Fresh Cut Flowers stamp set.
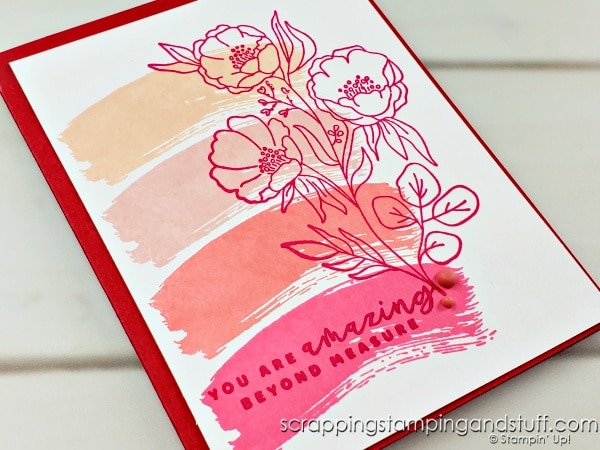
Here is another card I made recently with this same stamp, but I didn’t color it in. I made some really fun and simple cards that day, and you can see them here.
That’s it for today! If you’ve been afraid to try blending with these markers, I hope you’ll have the courage to try!
Supply List
Take a look at the products I used for today’s tutorial…
Product List


Learn To Make Cards
Shop Supplies
Rewards Program
Join My Amazing Team
Try these techniques and then let me know which alcohol marker blending technique works best for you!
Leave a Reply